Please note that it's a prerequisite that maintenance for ALL(!) licenses must be in place before an update or a transfer of an existing installation can be performed. If so, then you can perform either/or at any time FREE OF CHARGE. If this is NOT the case, then those costs apply:
- A new support contract for minimum one year starting from the license transfer is mandatory
- The maintenance gap must be closed by backdating the support contract until the expiration date of the old one. Please follow this link to learn why maintenance is important for you.
Transfer the W-ELP Software incl. the configuration to a new system
It is allowed to run both servers for max. 4 weeks in parallel, but then the ELP software on the old server must be uninstalled.
Here are the steps for moving your configuration on another server:
- In order to avoid any adaption of the W-ELP configuration it's recommended (if possible) to create the Windows printing queues with the same name, sharename (if any) and printer driver on the new target system as it was on the source system.
- Simply install the latest version from here on the new server.
- If the hostname of the target system is different from the hostname where W-ELP is currently running then you have to apply for a license change which will be processed within 2 business days.
- Don't forget to set the access rights - the W-ELP Control Center informs you about that at the initial start and does the job for you automatically after confirmation.
- On the old server open the workpath folder. For Windows installations it's: C:\ProgramData\WELP. If W-ELP was installed in 2017 or earlier the default workpath resides normally in the subfolder forms in the program folder where W-ELP was installed.
- At least transfer the main config file convert.ini to the new server's workpath folder. If this file has lines with IniFile= then you have to copy these .ini files also over to the new server. If you have custom forms - normally starting with 1000.mac/1000.mat and ending with 21999.mac/21999.mat - copy those also.
- If you have a local archive directory, check if you need the files/directories in there as well on the new server.
- If the queue names on the new server are identical to the old one and they already exist, continue with step 10.
- Windows only: Open the file convert.ini in the workpath folder and erase the complete rule: [ELP activated printers] with ALL REM keys below. Make sure that the convert.ini are stored in UTF-8 and not ANSI or anything else.
- Open all your ini files and check if you have rule names like the print queue names (Linux: printer names) on the old server. If yes change them to the new name convention.
- Do the same thing if you have rules based upon user names or driver names.
- If the new ELP was installed into another directory structure, check that none of your ini-files have the old installation path hard coded, e.g. c:\ProgramData\WELP can be replaced by #ELP_FORMS_PATH#. (In Linux be sure the -d Command Line Argument is provided)
- Windows specific additional configuration: Start the W-ELP Control Center and enter in the Startup Agent the new license key. Then
- If the queue names are identical to the old server exit the agent, click on the Install Tab. All queues can now be activated in the information popup you get.
- If they are not identical, set the two check boxes to no and activate the needed queues. - Even you are done now it's highly recommend to make a backup of the complete old workpath folder to the new server in case there was some more customizing done (e.g. FileSend.ini, MailConf.ini, stapling.ini etc.) which need to be reviewed.
Update ELP Software on the productive system
WARNING: Before doing that, it is strongly recommended so perform a full backup, image, snapshot or something similar of the machine where ELP is installed.
If you have a valid service contract for ALL(!) licenses, you are allowed to update your system any time to the last version without any charges for an update license.
Windows version:
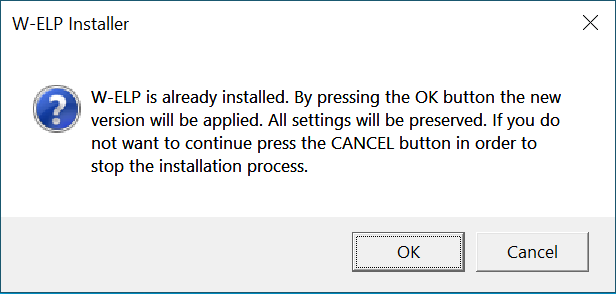
If you have installed the version 16.08.12 or later W-ELP allows an in-place update. This means that the standard installer W-ELP installer recognizes if the installation can be updated or not:
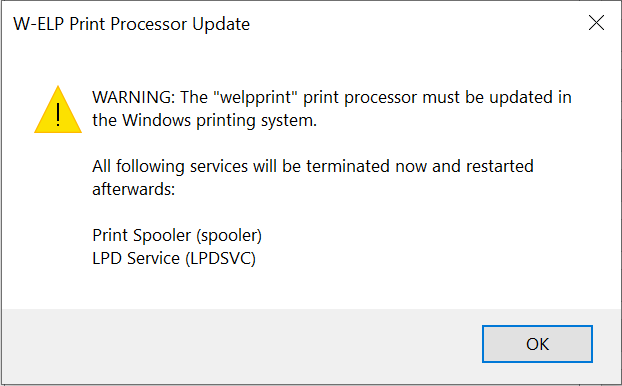
After the update the ELP Control Center is started automatically and it's likely that parts of the W-ELP Software which integrates themselves into the Windows Spooler must also be updated. This will stop certain Windows services like the Print Spooler and all other services (e.g. LPD, see screenshot below) which are depending on the Windows Print Spooler. This step cannot be omitted and - depending on the numbers of printers and dependent services - it can take several seconds and more.
If you are running an older version of W-ELP you have to backup your configuration and uninstall/reinstall the W-ELP product and re-apply your configuration. We recommend to read the readme_e.rtf (or readme_d.rtf for German language) file in the W-ELP install folder.
Uninstall ELP Software
Windows version:
1. Make sure the Windows Spooler service is running. You can check that in the Windows Services: Print Spooler
2. Launch the ELP - Control Center and go to the Install Tab. If there are still Windows Print Queues listed on the right side (installed) just select all of them and use the << button in order to remove the ELP functionality from all of them.
2. Finally uninstall the software using the Windows Control Panel -> "Uninstall a Program" and select the “stethos Enhanced Laser Printing" and hit Uninstall. The uninstaller will proceed the following steps:
- Remove registry entries
- Delete shortcut in Program Group/Start menu 'Enhanced Laser Printing ELP'
- Delete installation directory and program files
- Restart spooler (first stop spooler, then start back again)
- Remove print processor 'welpprint'
- Remove the port monitor 'stethos Enhanced Laser Printing'
NOTE: While uninstalling, the spooler is stopped and restarted automatically. So make sure no important print jobs are currently processed (e.g. on a print server).
Some configuration files will remain in the W-ELP Workpath folder. In order to clean up completely just remove this folder (e.g. c:\ProgramData\Welp) manually including any existing sub folder (if any).
Linux, Unix etc versions:
Simply remove the elp directory and reset the plug-in of the software into your printing systems, like CUPS.