 DE
DE  EN
EN Jump straight to the Quick Start. Only jump to the Detailed Description if you already understand the Quick Start.
Important: If you want to use the Ricoh Card Save (CardSave) procedure for capturing spool files in the Ricoh device instead of the versatile IBS capture feature described below you either must have IBS removed before or at least deployed the QuickSet PassThrough onto the device in order to have IBS temporarily disabled during the Card Save procedure. Please do not forget to have the PassThrough Quickset removed from the device afterwards because IBS will just do nothing once this QuickSet is loaded.

Quick Start
There are two methods of capturing data for debugging and both do need additional IP Ports as mentioned in the headline of each. In most cases justuse the standard method (method 1) described on the left. You will only use the legacy method (method 2) on the right when specifically requested by our engineers.
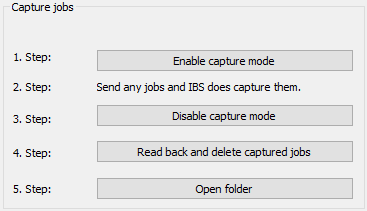
Follow the steps as they appear in the dialog:
- [Enable capture mode] - Click this, select the capture option (incoming is preferred) and answer the Quickset questions.
After this any jobs sent to the device will be stored as well as printed. - Send any jobs and IBS does capture them - Send any print jobs that you want analyzed and wait for them to finish printing.
- [Disable capture mode] - Click this after the print jobs have finished, then answer the Quickset questions.
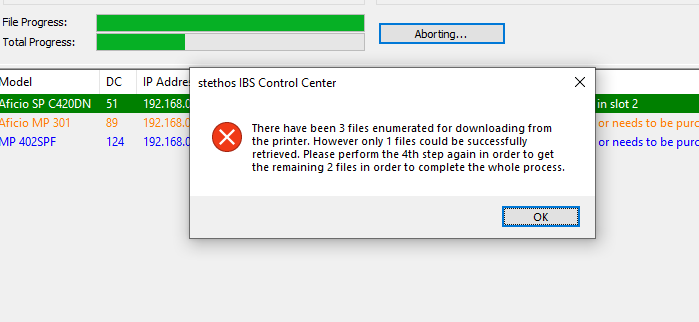
- [Read back and delete captured jobs] - Click this to retrieve the captured print jobs from the device to your local computer.
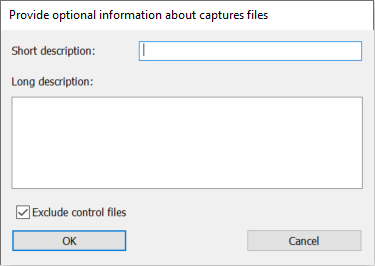
You will be asked to enter optional information. The short description, if entered, will be used as a prefix for filenames. - [Open folder] - Click this to open the folder where the captured print jobs are stored on your local computer.
After "5. step", you can then use your own tools (such as Notepad++) to examine the captured files or send them to your Ricoh support contact for analysis.
The above workflow should cover most needs and if it does, you can stop here.
Capture Options
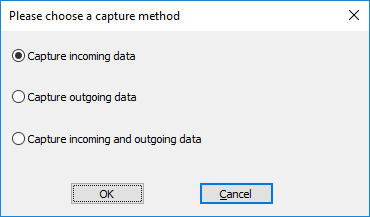
In step 1 you must choose a capture option:
- Capture incoming data - capture the print jobs as sent over the network to the device. This is the preferred option.
- Capture outgoing data - capture the print jobs after processing by IBS but before processing by the print engine.
- Capture incoming and outgoing data - capture print jobs in both forms.
Quickset Questions
Enabling and disabling capture, steps 1 and 3, are accomplished through standard "Quickset" files. If these dialogs about Quicksets appear, answer as follows:
- "There is already another Quickset active in the device. Do you want to retrieve ..." - click [No]
- "A present Quickset will be replaced. Do you want to continue?" - click [Yes]
- "Send of file was successful" - click [OK]
Detailed Description
The standard and preferred debug method, method 1, is on the left. The legacy debug method, method 2, is on the right in the dialog.
The device table of the debug menu shows only the devices, which
- had been found during the network scan and
- are currently running IBS in demo or full licensed mode.
Is a certain device missing from the table, please check the device and make sure that:
- it is powered on and
- be sure the IBS is installed and runs minimum in demo mode.
- after that maybe re-scan for devices on the network.
Method 1: Capture all Jobs
This method is capturing continuously all print jobs which are sent to the Ricoh device and operates on the Diprint (TCP 9100) Port:
| Step 1 | Activate | Depending on what you need to capture, IBS Control Center comes with three predefined Quicksets which are located in C:\ProgramData\IBS_CC\debugfiles They are named:
 If you understand Quicksets and the settings, you may modify these files for your needs. For example you can add "NoPrinting=ON". After clicking [OK], IBS CC checks if the device already has a Quickset loaded - possible from a previous enable/disable of capture mode. You can choose to retrieve the current one from the device and save it to your local PC. This is only really meaningful if you have modified your Quickset. 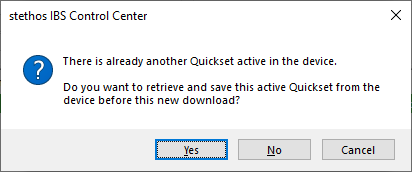 You may reload the retrieved Quickset any time using the Quickset import function. 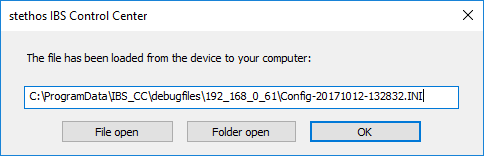 After a last warning that the capture Quickset will overwrite a possible existing Quickset in the device the Quickset will be downloaded and capture will become active immediately. |
| Step 2 | Send data | You can now send any PCL5 print jobs from any application to the printer. From now on all jobs which are submitted to the device are archived on the mass storage device (e.g. HDD, SSD, eMMC) and printed in parallel. |
| Step 3 | Turn off | The previously loaded Quickset file is overwritten by a neutral Quickset doing nothing special. |
| Step 4 | Read back |
Before reading back the captured data you may enter optional information in order to better identify the captured data:
|
| Step 5 | Open folder | Opens the directory with the most recently transferred data streams in the File Manager. You may now open the files using an editor, e.g. like Notepad++. If you need assistance, please send the files to your Ricoh support contact. Note: If the control files have been excluded from retrieval the suffix numbering of the files may not be contiguous. |
Method 2: Capture one single job and logs
This method operates on the IBS TCP Port 10001. The benefits of this method are:
- Besides returning the last in-coming and out-going data stream, IBS also returns two additional log files. They can assist IBS experts in verifying what might go wrong.
- If you have a convert.ini configuration file, the rules therein will still be active and documented in the log_file.txt.
- You can upload the files for each job, without turning the debugging off.
The disadvantage to this is that there may be two data stream files (in_data.prn and out_data.prn) containing the De-initialization of the data stream or they may possibly be empty. The reason for that is briefly explained in step 2 of the table below.
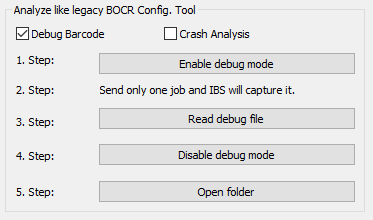
| Step 1 | Activate | A debug-enabler is sent to the device and the next job is captured. Note: The amount of time for the first page to print may be increased significantly because writing the log file requires some amount of time. |
| Step 2 | Send data | Now you can send a data stream from any application. Note that if more than one data stream is sent, only the last one will be kept. Some applications will send a device reset or empty page at the end, which may result in an empty or tiny capture file. |
| Step 3 | Read log file | Depending upon the selected mode, IBS CC reads 3 (one checkbox active) or 4 (two checkboxes active) files back from the device.
Note: As explained above, the .prn files may be empty or just contain the de-initialization part of the data stream sent. |
| Step 4 | Turn off | Just click and the setting is removed. |
| Step 5 | Open folder | Opens the folder with the most recently transferred data streams in the File Manager. You may now open the files using an Editor, e.g. like Notepad++. If you need help, then send the files to your Ricoh support contact. |
Note: For both operation modes, the top progress bar displays the current file transfer, while the lower progress bar displays the over all transfer of files.